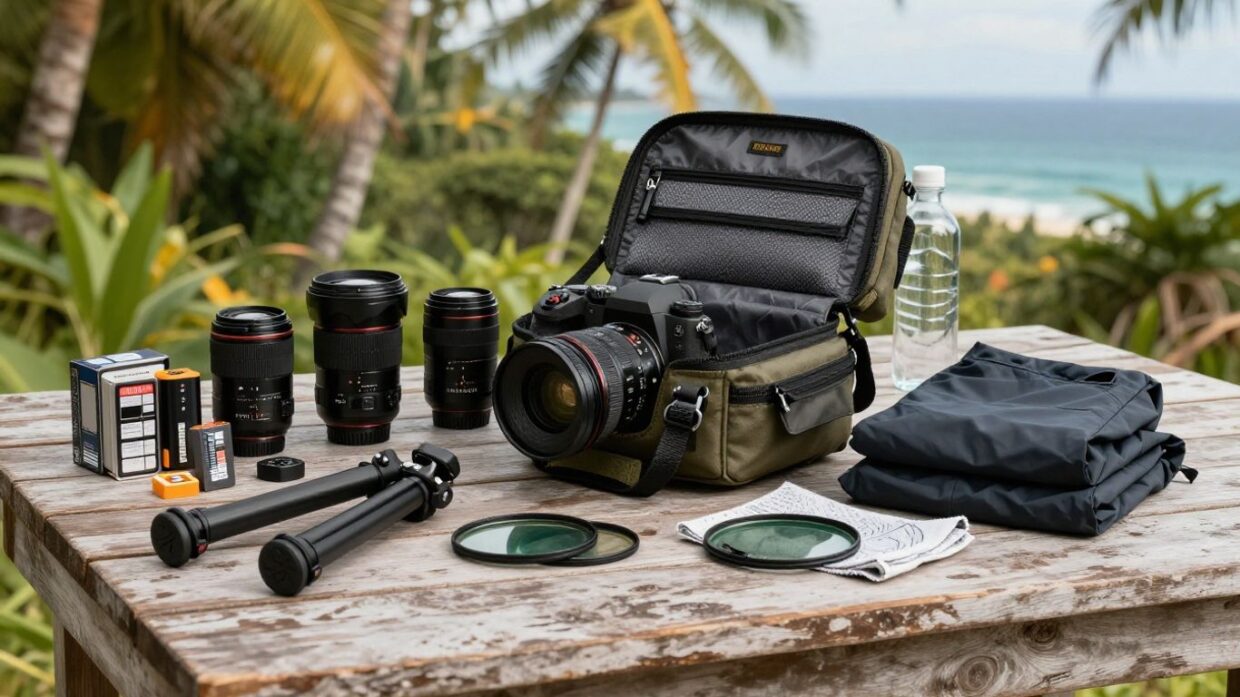
Key Takeaways
A useful camera bag is shaped by the outing, not by a universal packing list. Carry enough to handle the conditions, but leave room for comfort and clear thinking.
- Choose a camera body, lenses, batteries, and cards that suit the actual shoot.
- Protect equipment from rain, dust, sand, humidity, and accidental knocks.
- Add support, filters, lighting, or a remote only when they serve a clear purpose.
- Keep power, memory cards, cleaning supplies, and personal essentials organised.
- Repack your bag for everyday walks, travel, landscapes, events, and portraits.
Start with the camera gear you actually need
The best camera bag essentials are the pieces that help you make the photographs you set out to make. Before you pack, think about the location, the light, the distance you will walk, and the subjects you expect to find. A heavy bag can be just as limiting as an underprepared one. Start with a simple setup, then add equipment only when you can explain why it belongs.
Choose one camera body or a backup
For most outings, one reliable camera body is enough. Check the battery, sensor settings, and controls before you leave, then place the body where you can reach it without unpacking the whole bag. If the shoot is paid, lengthy, or difficult to repeat, a second body may be worthwhile as a backup, but you still need to consider its weight and protection.
A backup body is only helpful if it is charged and compatible with the lenses, batteries, and cards you carry. Keep it wrapped or in a separate padded compartment so a small knock does not affect both bodies at once. For a casual walk, that extra weight may be better replaced with water or a spare battery.
Pack versatile lenses for your shooting plans
Choose lenses around the photographs you expect to make rather than packing every focal length you own. A wide lens can suit broad landscapes and close environmental scenes, while a standard or short telephoto lens often handles everyday details, portraits, and distant subjects with less swapping. If you are photographing wildlife or birds, the reach you need may justify a larger lens, but plan the walk around its size.
The most flexible combination is often the one you will actually carry and use. Think about whether changing lenses in wind, dust, or humidity will be practical, and keep a front and rear cap on anything that is not mounted. A small, purposeful lens set leaves more room for support and personal supplies.
Bring extra batteries and memory cards
A full battery and an empty, tested memory card should be your starting point. Extra batteries matter when you spend a long day outdoors, use a bright screen frequently, or work in cooler conditions. Extra memory cards give you breathing room when a session runs longer than planned and reduce the temptation to delete files while you are still shooting.
Store cards in a small case rather than loose in a pocket. You can also turn a card around after use so that empty and full cards are easy to tell apart. The habit is simple, but it prevents a frustrating search at the moment a good subject appears.
Match your setup to the location and weather
Darwin conditions can change the way you pack. Heat, humidity, sudden rain, muddy ground, and fine dust all affect how quickly you can work and how carefully you need to handle your gear. A short walk near town may need only a camera, one lens, water, and a rain cover, while a remote landscape session calls for more power, protection, and navigation planning.
Check the forecast, but do not treat it as a guarantee. Look at the route, shade, access to shelter, and how long you may be away from your vehicle. Your kit should be ready for the conditions you are likely to meet without becoming so large that you avoid taking it out.
Protect your equipment from everyday risks
Protection is not just about expensive cases. It is also about stopping lenses from rubbing together, keeping rain away from open compartments, and giving small accessories a predictable home. A well-organised bag lets you move carefully when the ground is wet or the light is changing quickly. It also makes it easier to notice when something is missing before you leave.
Use padded compartments and lens wraps
Padded dividers help keep a camera body and lenses from colliding as you walk. Adjust them so the equipment sits firmly without being squeezed, and leave enough space to remove a lens without dragging it across another item. Lens wraps add a useful layer when you need to carry a lens outside a dedicated compartment or place it briefly on a clean surface.
Check the stitching, fasteners, and divider placement from time to time. A compartment that worked with one lens may become awkward when you change your setup. Keep heavier pieces close to your back so the bag feels more stable on longer walks.
Add rain protection for sudden weather
A rain cover or waterproof outer layer can buy you time when a shower arrives unexpectedly. Keep it somewhere you can reach from outside the main compartment, rather than buried beneath the camera. If you use a separate dry bag for clothing or spare supplies, make sure it does not crowd the camera area or stop you from closing the bag properly.
Rain protection is not a reason to keep shooting through every downpour. Once you reach shelter, wipe the outside of the bag and allow damp equipment to dry gradually in a ventilated place. Avoid sealing wet gear away for hours, because trapped moisture can create a bigger problem than the rain itself.
Prevent dust, sand, and moisture damage
Dust and sand are especially troublesome when you change lenses outdoors. Turn your back to strong wind, keep the camera mount facing down where practical, and make the change quickly. In humid weather, let equipment adjust gradually when moving between air conditioning and the heat outside, rather than opening the bag immediately in a steamy environment.
Treat the weather as part of the scene, but never treat your equipment as weatherproof by assumption.
That mindset encourages sensible habits without making you nervous about every drop of water. Carry a cloth for the outside of the camera, keep caps attached, and inspect the bag after a sandy or wet outing before packing it for the next one.
Keep small items from scratching your gear
Loose batteries, coins, keys, filters, and metal clips can scratch screens or lens barrels when they share a compartment. Give each group a soft pouch or zipped pocket, and avoid placing a lens directly beside anything hard. A clean microfibre cloth can protect a lens temporarily, but it should not replace a proper padded divider.
Keep personal items separate from camera equipment as well. Sunscreen, snacks, and drink bottles belong in sealed outer pockets where a leak will not reach the camera. This small separation makes the bag easier to inspect and safer to unpack.
Pack the tools that help you get the shot
Accessories should solve a problem you are likely to encounter. A tripod can steady a long exposure, a filter can control reflections, and a remote can reduce camera movement. None of them is automatically essential for every walk. Consider the photograph first, then decide whether the accessory earns the space and weight.
Carry a lightweight tripod or support
A compact tripod is useful for long exposures, night scenes, carefully composed landscapes, and self-portraits. Look for a stable setup that suits the weight of your camera and lens, not simply the smallest model available. If a full tripod is too much for the outing, a monopod, beanbag, or firm natural surface may provide enough support for the photographs you have in mind.
Pack the tripod so it does not swing against the bag as you walk. Check the feet and locks before leaving, especially if you have used it near sand or mud. A support that takes too long to set up can become a burden, so practise deploying it at home.
Include filters for light and reflections
Filters can be helpful when you know what they are doing. A polarising filter may reduce reflections on some non-metallic surfaces and deepen the appearance of a blue sky, while a neutral density filter can reduce the light reaching the sensor when you want a longer exposure. Their value depends on the scene, the angle of the light, and the result you want.
Keep filters in individual sleeves or a compact case. Check that the thread size matches the lens you plan to use, and clean the filter before mounting it. Carrying several filters without a clear use adds clutter and can slow you down when conditions change.
Pack a flash and useful lighting accessories
A flash can help when you need additional light for a portrait, detail, or indoor scene. If you carry one, remember the supporting pieces: spare batteries, a small diffuser if it suits your approach, and a way to position or secure the flash. For outdoor work, a reflector or a simple piece of white material may be more useful than a larger lighting kit.
Think about the people and places around you before using flash. In a quiet location or during a private event, ask first where appropriate. Pack only the lighting tools you understand well enough to use without losing the moment.
Add a remote shutter release when needed
A remote shutter release is useful when you want to trigger the camera without touching it. It can help with long exposures, self-portraits, and scenes where pressing the shutter might cause movement. Confirm that it suits your camera connection and remember to check its battery before you leave.
For some photographs, the camera timer achieves the same result without another accessory. Decide based on how often you use the remote and whether setting it up will genuinely make the shoot easier. Small tools still take up attention, even when they take up little physical space.
Prepare for power, storage, and file management
A day of photography can fail quietly when the camera runs out of power or a card becomes difficult to identify. Good file management begins before you press the shutter. Charge everything, check available capacity, and decide what you will do with the files when the outing ends. These steps are not glamorous, but they protect the work you cannot recreate.
Bring the right chargers and power banks
Pack the charger or charging cable that actually matches your camera and batteries. If you use a power bank, test the cable and confirm that the arrangement works before relying on it outdoors. Keep charging equipment together in a small pouch so you do not have to search through the main compartment.
Power banks are useful only when they are charged themselves. Make a quick check the night before, and avoid leaving batteries loose where their contacts could touch metal objects. On a short outing, one spare battery may be enough; on a full-day trip, carry a plan rather than guessing.
Organise memory cards safely
A card case protects cards from dust, moisture, and accidental bending. Use a simple system: cards facing one way are empty, and cards facing the other way have been used. If you prefer a written record, note the date or outing in a small notebook rather than relying on memory after a long day.
Do not fill a card until you are forced to stop. Swap it when you have comfortable remaining space, then store the used card in its case immediately. This gives you a second copy of your workflow and makes it less likely that an exposed card will disappear in a pocket.
Back up photos while traveling
If you are away from home for several days, plan where your files will live each night. A laptop, tablet with storage, or dedicated drive can provide a working copy, while a second device or secure cloud process can add another layer when the connection and setup allow it. The method matters less than having a routine you can follow consistently.
A backup is most useful when it happens before you need it.
Copy files in a quiet moment, check that the transfer has completed, and keep the original card untouched until you have confirmed the files. This approach takes a little patience but is far safer than trusting one card with an irreplaceable trip.
Label cards and batteries for easy tracking
Small labels or a fine marker can help you identify batteries and cards quickly. Number batteries if you have several, and mark cards in a way that does not cover important information. You can then notice which battery needs charging or which card has already been used without emptying the entire bag.
Keep the system consistent across outings. A label is only helpful when you understand it later, so choose a short notation and use it every time. This is particularly useful when you are working quickly or sharing equipment with another photographer.
Add personal comfort and camera-care essentials
Your camera is not the only thing that needs planning. Heat, long walks, slippery paths, and changing light can make a shoot uncomfortable before they make it technically difficult. Water, food, clothing, and basic care supplies help you stay alert and make sensible decisions. A comfortable photographer is more likely to notice good light and less likely to rush.
Pack a cleaning kit for lenses and sensors
A small cleaning kit might include a blower, a clean lens cloth, and suitable lens-cleaning materials. Use the blower before wiping dust across glass, and keep used cloths separate from clean ones. Sensor cleaning requires care, so if you are not confident, avoid improvising in the field and use an appropriate service or method when you are back in a clean environment.
Keep the cleaning kit sealed so it does not collect the very dust it is meant to remove. Check the lens at an angle in good light, and clean only when marks are affecting the image or making the view difficult. Over-cleaning can create its own problems.
Carry water, snacks, and basic first-aid supplies
Water should match the length and conditions of your outing, especially in hot and humid weather. A small snack can be useful when you are away from shops or staying out through a changing light window. Basic first-aid supplies, such as plasters and antiseptic wipes, can also be sensible for minor scrapes on uneven tracks.
Place these items in an outer pocket that is separate from the camera. Choose packaging that will not leak, and check it after each outing. A few practical supplies can make the difference between continuing comfortably and turning back too early.
Choose comfortable straps and camera bag inserts
A strap should distribute weight without cutting into your neck or shoulder. Adjust it before you leave, and consider whether a sling, harness, or padded insert suits the way you move. Inserts are useful when you want to turn an ordinary backpack into a camera bag, provided they fit securely and do not leave the equipment sliding around.
Test the loaded bag at home. Walk, bend, and lift it as you would on location, then move anything that digs into your back or makes the camera hard to reach. Comfort is part of the camera bag essentials because it affects how long you can work with care.
Keep weather-appropriate clothing within reach
A lightweight rain jacket, hat, warm layer, or spare shirt can be more valuable than another accessory when conditions turn. Tropical weather can shift quickly, and wet clothing can make a long walk unpleasant even when the camera remains dry. Pack clothing where you can reach it without unpacking your equipment.
Use a separate dry pouch for anything that must stay dry. If you finish the day with damp clothing, remove it from the camera compartment as soon as you can. The same bag should not become a sealed container for moisture overnight.
Customize your camera bag for each type of shoot
There is no single perfect loadout. Your everyday walk, a trip through a busy city, a remote landscape session, and an event all place different demands on your equipment and your attention. Repacking takes a few minutes, but it can remove several unnecessary kilos. Start with the camera and lens most likely to be used, then build around the conditions.
Build a compact everyday photography kit
For a casual outing, try a camera body, one versatile lens, a spare battery, one or two memory cards, a cloth, and water. Add a rain cover if the forecast or location calls for it. This smaller setup is easier to carry and lets you respond quickly without constantly deciding which item to use.
Leave specialised filters, a tripod, and extra lighting at home unless you have a clear plan for them. Everyday photography often rewards being ready for an unexpected scene rather than preparing for every possible technique. The lighter bag may also encourage you to take the camera along more often.
Prepare for travel and street photography
Travel and street work call for discretion, quick access, and sensible protection. Carry a compact body and lens combination, spare power, cards in a secure case, and a small cleaning cloth. Keep valuables close, avoid an overfilled bag, and choose a setup that does not draw unnecessary attention in crowded places.
Before walking through a new area, think about transport, weather, and where you can safely stop to change batteries or cards. A quiet packing system helps you stay aware of your surroundings. Keep passports, money, and personal documents in a separate secure compartment rather than mixing them with accessories.
Pack for outdoor and landscape sessions
Landscape sessions often require more time outside and more careful preparation. You may need a wide lens, tripod, filters, spare power, rain protection, water, warm or sun-protective clothing, and a cleaning kit. The route and surface matter too: a short accessible lookout needs a different load than a long track over rough ground.
Pack heavier items close to your back and balance the tripod so it does not pull the bag sideways. Keep filters and cards protected from grit, and allow time to set up before the best light arrives. A deliberate pace usually produces better results than carrying every lens and rushing between viewpoints.
Adjust your kit for events and portraits
Events and portraits require access to the gear you use repeatedly. Two compatible lenses, spare batteries, memory cards, a flash if appropriate, and a reliable support or remote may be more useful than a broad landscape setup. Arrange the bag so you can change a card or battery without placing loose items on the floor.
For people photography, consider the location, permission, available light, and how much movement you need. Keep your kit tidy and quiet, especially during formal moments. A simple setup that you know well will usually serve you better than a crowded bag full of options you rarely use.
Conclusion
Your camera bag should support the photograph, the location, and the way you actually work. Pack the core gear first, protect it from the conditions, then add only the tools and personal supplies that earn their space. When you adjust the loadout for each outing, you can carry less, stay comfortable, and remain ready for the moments worth photographing.
Frequently Asked Questions
How do I decide what belongs in my camera bag?
Start with the subject, location, expected weather, and length of the outing. Choose the camera, lens, power, and storage you need first, then add accessories that solve a likely problem rather than packing every item you own.
How many lenses should I take on a photo outing?
Take as many as your planned photographs require and as many as you can carry comfortably. One versatile lens is often enough for a casual outing, while a landscape, wildlife, portrait, or event session may justify a more specific combination.
Should I carry a tripod every time?
No. A tripod is useful for long exposures, night work, carefully arranged scenes, and some self-portraits, but it adds weight. Leave it behind when you are unlikely to use it, or choose a smaller support for a lighter outing.
How can I protect camera gear from rain?
Carry a rain cover or waterproof outer layer where you can reach it quickly. Avoid changing lenses in exposed conditions, move to shelter when possible, and let damp equipment dry gradually in a ventilated place rather than sealing it away while wet.
What is the safest way to store memory cards?
Use a protective card case and keep used and unused cards separate. A consistent orientation system makes them easier to identify, and you should keep used cards untouched until your files have been copied and checked elsewhere.
What should I pack for photography in hot, humid weather?
Carry water, sun protection, a cloth, rain protection, spare power, and a sealed place for personal items. Protect the camera from sudden moisture changes, avoid leaving it in direct heat, and give damp equipment time to dry after the outing.
How often should I clean my camera gear?
Clean gear when dust, fingerprints, or marks affect use, rather than wiping everything constantly. Use a blower before cleaning glass, keep cloths clean, and take extra care with sensor cleaning if you are not familiar with the process.