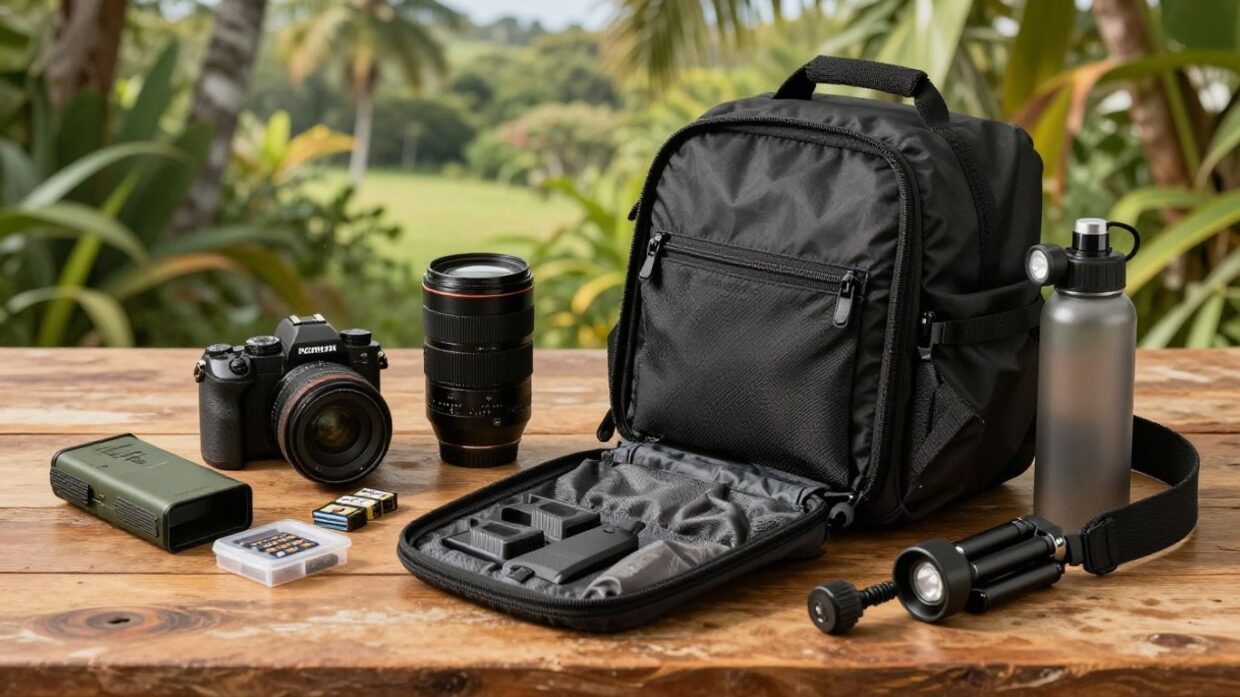
Key Takeaways
A good camera bag keeps you prepared without turning every outing into a weight-lifting exercise. Choose gear that suits your subject, the weather and the way you actually photograph.
- Carry a dependable camera body and only the lenses you are likely to use.
- Pack spare batteries, charged memory cards and a simple cleaning kit.
- Protect your equipment from rain, dust and knocks while travelling.
- Use a strap, tripod and lighting accessories when they genuinely support the shoot.
- Leave room for water, sun protection and small emergency items.
1. A versatile camera body
Your camera body is the centre of your kit, so it should suit the way you work rather than simply have the longest list of features. For landscape photography around Darwin, you may want a body that feels comfortable during long walks, responds quickly when light changes and produces files you can work with later. A familiar camera is often more useful than an impressive one you have not yet learned to operate.
Before you pack, check the basics: battery level, sensor settings, date and time, and the available storage. It is also worth checking that your preferred shooting mode and autofocus settings are ready for the day ahead. Familiar controls save time when a cloud moves across the sun or a scene changes unexpectedly.
Try to match the body to the outing. A short walk to a lookout may justify a larger setup, while a long trek through open country calls for something you can carry comfortably for hours. The best camera bag essentials are not necessarily the most expensive items; they are the pieces that help you stay ready without distracting you from the landscape.
2. The right lenses for your subject
Lenses shape how you see a scene, and carrying too many can make photography feel like logistics. A wide lens is a natural choice for broad country, layered skies and foreground detail, while a standard or short telephoto lens can help isolate a distant feature or compress layers in the landscape. Your subject and route should guide the choice.
Think about what you are likely to photograph before leaving home. If you are walking beside a wetland, you may want reach for birds or distant details; if you are photographing rock formations, a wider view may be more useful. Packing one lens that covers your most likely subjects can be more practical than carrying several options you never remove from the bag.
Keep each lens protected in a padded compartment or soft pouch, and avoid leaving loose caps where they can be lost. If you change lenses outdoors, turn your back to strong wind and dust, keep the camera opening pointed down and make the swap quickly. A smaller, considered selection usually leaves more room for the other essentials you will rely on.
3. Spare batteries and a reliable charger
A flat battery can end a promising outing before the best light arrives. Carry at least one charged spare that is compatible with your camera, and check it before every trip rather than assuming it was charged after the last one. Live view, long exposures, cold conditions and frequent image review can all affect how long a battery lasts.
At home, keep your charger in one consistent place and recharge used batteries as soon as you return. For longer trips, a compact charger or suitable power bank can make it easier to stay prepared, but you should confirm that your charging setup is compatible before relying on it. Store charged and depleted batteries separately so you can tell which ones are ready.
A small battery pouch is useful for keeping contacts clean and preventing loose batteries from rubbing against other equipment. Do not leave batteries baking in a hot parked car, particularly in the Top End. Good battery habits are simple, but they prevent the frustrating moment when the scene is ready and your camera is not.
4. Extra memory cards
Memory cards take up very little space, yet they can determine whether you keep shooting. Carry more capacity than you expect to need, especially if you photograph in raw format, make long bursts or record video as well as stills. Keeping your cards in a small protective case is safer than letting them move loose among cables and coins.
A simple packing routine makes cards easier to manage. Consider keeping unused cards facing one way and used cards facing the other, or placing them in separate sections of the case. These four checks can help before you leave:
- Confirm that each card works with your camera.
- Format cards in the camera when they are safely backed up.
- Carry a spare rather than relying on one high-capacity card.
- Keep the card case dry and easy to reach.
That routine reduces hurried decisions in the field. Avoid deleting individual images while you are still shooting unless you have a clear reason, as it is easy to remove the wrong frame on a small screen. Once you return, copy your photographs to a secure location before formatting the card for its next outing.
5. A compact camera cleaning kit
Dust, salt spray and fingerprints are part of outdoor photography, particularly when you move between dusty tracks and humid coastal air. A compact cleaning kit helps you deal with ordinary marks without carrying a bulky collection of tools. A blower, a soft lens brush and a clean microfibre cloth cover many everyday situations.
Use the blower before the cloth, since rubbing grit across glass can cause scratches. Keep the cloth in a sealed pouch so it does not collect more dust than it removes, and replace it when it becomes dirty. You may also want a few individually wrapped lens-cleaning wipes for situations where a dry cloth is not enough.
Clean gently and only when needed. If dirt has reached the sensor or the inside of a lens, avoid experimenting in the field; protect the camera, fit a cap and arrange proper cleaning later. A small kit is there to handle fingerprints and loose particles, not to turn an uncertain repair into a bigger problem.
6. A sturdy camera strap
A strap gives you a safer way to carry the camera when you need both hands for a gate, a climb or a quick change of position. It also reduces the temptation to place the camera on dusty ground while you adjust your bag. Choose one that feels comfortable against your neck or shoulder and attaches securely to your particular body.
Check the strap and its connection points before every outing. Look for fraying, loose stitching or hardware that has started to open, especially if the camera is heavy. A strap that twists constantly can become irritating during a long walk, so adjust it at home and test how the camera sits when you move.
Your carrying style should match the terrain. Keep the camera close when walking through scrub or crowded spaces, and shorten the strap when you need more control. A strap does not replace careful handling, but it adds a useful layer of security and keeps your hands available for the rest of your kit.
7. A lightweight tripod
A tripod is not essential for every outing, but it earns its place when you want a carefully aligned composition or a longer exposure. It can also help you keep the camera steady at first light, after sunset or when you are working with a smaller aperture. For walking-based landscape work, weight and packed size matter as much as maximum height.
Look for legs that lock positively and a head that holds your camera without drifting. Before committing to a tripod, check that it fits inside or attaches securely to your bag and that you can carry it comfortably over the distance planned. A lighter tripod that you actually bring is more useful than a heavier one left at home.
Set it on stable ground and spread the legs wide when conditions are uneven. Avoid extending the centre column unless you need the extra height, as this can make the setup less steady. A tripod should support your decisions, not slow every photograph down, so use it when the extra control genuinely improves the scene.
8. Weather protection for your gear
Darwin weather can change quickly, and even a short shower can create problems for unprotected equipment. A rain cover for your bag, a lightweight camera sleeve and a few sealable plastic pouches can help you respond without panic. They are useful for sudden rain, damp grass, spray near the water and muddy ground.
Pack protection where you can reach it before the weather turns. The general rule is simple:
Protect the camera before you think you need to.
Once rain arrives, move under cover, keep the bag closed and wipe external moisture away with a clean cloth. Do not seal visibly wet equipment in an airtight pouch for longer than necessary, because trapped moisture can create its own problems; let gear dry gradually in a safe, shaded place when you return.
A cover will not make equipment invulnerable, so use common sense about exposure. Avoid changing lenses in driving rain, keep caps on spare lenses and do not place the bag in puddles or wet sand. Weather protection is most useful when it gives you time to make a calm decision rather than encouraging you to ignore the conditions.
9. Portable lighting accessories
Natural light is often the reason you head outdoors, but a small light can be handy for practical tasks and creative details. A compact LED light may help you find a dropped accessory in a dark bag, illuminate a close foreground subject or add gentle fill when you are photographing people at camp. It is an optional tool, not a substitute for learning how the available light is behaving.
If you carry a light, pack its charging cable or spare batteries and protect the controls from being pressed inside the bag. A small diffuser can soften the output, while a simple clamp or mini stand may help when you need both hands free. Keep the setup modest so it does not take the place of more important equipment.
Use artificial light with restraint in a landscape. It can easily look unnatural when the surrounding scene is subtle, especially near dawn or dusk. Test the brightness on a nearby object before using it on a subject, and remember that a torch is also valuable for safely packing up after the light fades.
10. Personal comfort and emergency items
Your camera gear is only part of a successful day outside. If you are thirsty, sunburnt or uncomfortable, you will be less patient with composition and less alert to changing conditions. A practical bag leaves space for water, sun protection, suitable clothing and a few basic items that help you stay out safely.
The exact contents depend on your location and route, but consider carrying a small collection such as:
- Water and a snack for the planned time outdoors.
- Sunscreen, a hat and insect repellent.
- A basic first-aid pouch and any personal essentials.
- A head torch or compact torch for low light.
- A phone, power bank and a simple way to keep them dry.
These items may seem unrelated to photography, yet they protect your attention and your ability to return comfortably. Tell someone where you are going when the route is isolated, check the forecast and leave room to pack out rubbish. A camera bag that supports the whole outing will serve you better than one filled entirely with accessories.
Before you leave, lift the packed bag and walk around with it for a few minutes. Remove anything that solves a problem you are unlikely to face, then add back the items that protect your equipment or your comfort. That small trial is often the quickest way to turn a crowded collection of gear into a useful set of camera bag essentials.
Conclusion
The best camera bag essentials are the ones that keep you ready without making the journey harder than it needs to be. Start with a dependable body, suitable lenses, charged power and spare storage, then add protection, support and personal items based on the conditions. When your kit is comfortable and familiar, you can spend less time searching through the bag and more time watching the light.
Frequently Asked Questions
How many lenses should you carry in a camera bag?
Carry the smallest selection that covers the subjects you genuinely expect to photograph. For many outings, one versatile lens and one specialist option are enough, while a longer walk may call for just one lens to reduce weight.
Do I need a tripod for landscape photography?
Not always. A tripod is useful for carefully aligned compositions, low-light work and longer exposures, but it is reasonable to leave it at home when you need to travel lightly or expect to work quickly.
How many spare batteries should I pack?
Pack at least one charged spare for a short outing, then adjust for temperature, camera use and access to charging. Longer trips may require more, but testing your usual battery life will give you a better guide than a fixed number.
What should be in a basic camera cleaning kit?
A blower, soft brush and clean microfibre cloth are a practical starting point. Keep the kit protected from dust, and avoid attempting complex sensor or internal cleaning if you are unsure how to do it safely.
How can I protect my camera from rain?
Use a bag rain cover or camera sleeve, keep spare protection within easy reach and avoid opening the bag unnecessarily. Once you are sheltered, dry the outside of the equipment and allow damp gear to dry gradually.
Is a camera strap really necessary?
A strap is not compulsory, but it can make carrying safer and more comfortable. It is particularly useful when you need both hands free or want to keep the camera close while moving over uneven ground.
How do I keep my camera bag from becoming too heavy?
Plan around the subject and route before packing. Remove duplicate accessories, choose compact alternatives where practical and test the loaded bag at home so you can adjust it before the walk begins.