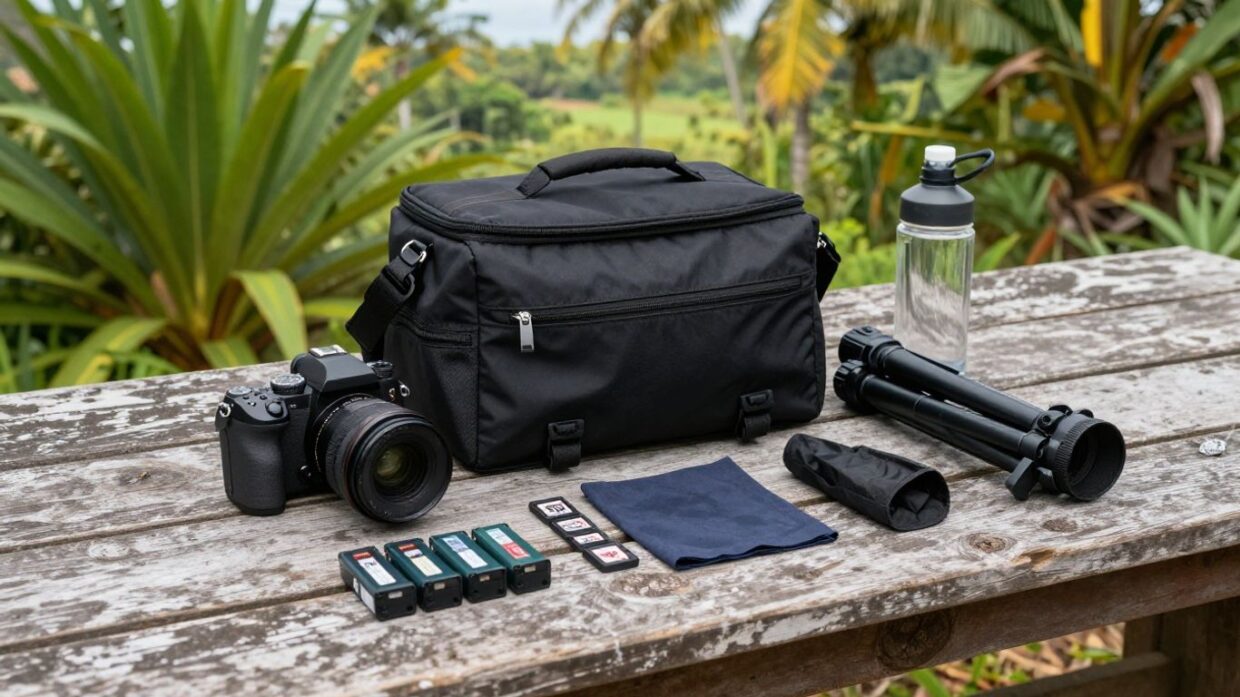
Key Takeaways
A good camera bag keeps your equipment protected without turning a simple outing into a heavy carry. Pack for the light, weather, location and length of the shoot, then arrange everything so you can reach it without unpacking the whole bag.
- Choose a bag that suits your camera kit and the way you move.
- Carry a camera body, useful lenses, spare power and memory cards.
- Prepare for rain, dust, changing light and small cleaning jobs.
- Add practical personal items for comfort and safety.
- Review your kit before each outing and remove equipment you will not use.
Choose the right camera bag for your shooting style
The right bag depends less on what looks professional and more on how you actually photograph. A day walking through Darwin needs a different setup from a short portrait session or a drive to a remote landscape. Start with the equipment you use most, then choose a bag that protects it without leaving you room to fill with unnecessary weight.
Match bag capacity to your gear
Lay out your camera body, lenses and likely accessories before you shop for a bag. The internal space should hold that working kit with a little room for a spare battery and basic protection, but it does not need to accommodate every piece of equipment you own. Leave a little breathing room so you can remove an item without disturbing everything else.
If the bag is too tight, gear can press against other gear and become awkward to remove. If it is much too large, loose items may shift as you walk and the extra capacity can tempt you to pack “just in case” equipment.
Compare backpacks, shoulder bags, and sling bags
A backpack spreads weight across both shoulders and is usually a sensible choice for longer walks, uneven ground or a full landscape kit. A shoulder bag gives you quick access while standing still, though one-sided weight can become tiring over a long day. A sling sits between the two: it can move around your body for access while remaining relatively compact.
Think about when you need the camera in your hand. For changing viewpoints on a trail, a backpack can be comfortable; for a street session with frequent stops, a sling may be less cumbersome. The best choice is the one you can carry steadily and open confidently.
Consider comfort, weather protection, and access
Look for padded sections, adjustable straps and a shape that sits securely against your body. A bag that protects equipment but rubs your shoulders or swings when you bend down will make the outing harder. In wet or dusty places, weather-resistant fabric and a fitted cover can give you useful extra protection, although no soft bag should be treated as completely waterproof.
Check the zips and compartments before you commit. You should be able to reach the camera without placing the bag on a muddy or wet surface, and you should know which pocket holds each small accessory.
Avoid carrying equipment you rarely use
Before leaving, ask what the location and subject genuinely require. A wide range of equipment can sound reassuring, but every extra item adds weight, takes up space and creates another decision when the light changes. If you have not used a particular accessory on recent outings, leave it at home and reassess after the next shoot.
A short test walk can reveal more than packing lists do. Carry the bag around the house or down the street, then remove anything that feels unnecessary before you head out.
Pack your core camera gear
Your camera body and lenses form the working centre of the bag. They deserve the easiest-to-reach, best-padded positions, while smaller items should have fixed homes around them. Build the kit around the photographs you expect to make rather than trying to cover every possible subject.
Start with your camera body and primary lens
Fit your primary lens before you leave if it suits the main subject. That way, you can begin shooting quickly rather than opening the bag in a dusty or windy spot. Store the camera with its strap arranged so it does not snag on dividers or other equipment.
If you are moving through rough terrain, keep the camera in a padded compartment when it is not in use. A lens hood can help protect the front of the lens from stray knocks, while a body cap should be used whenever the lens is removed.
Add a versatile backup lens
A second lens can give you a practical change of perspective without making the kit unwieldy. For landscapes, that might mean a lens that covers a useful range beyond your primary lens; for portraits, you may prefer a lens that offers a different working distance. Take the lens that solves a likely problem, not the one that merely fills an empty compartment.
Pack each lens with both caps fitted and place it in a padded divider. If you are unsure whether you will use it, leave it behind and use the saved space for power, weather protection or personal supplies.
Carry spare batteries and memory cards
A flat battery or full memory card can end a promising session at exactly the wrong moment. Carry charged spare batteries in a closed pocket and keep memory cards in a small case that protects them from dust and accidental bending. It is also worth checking the remaining capacity before you leave, rather than discovering it at the first viewpoint.
A simple routine helps prevent confusion: put used cards in one dedicated place and unused cards in another. That small separation is easier to follow when you are working quickly.
Protect your gear with caps, wraps, and dividers
Caps, wraps and padded dividers are not glamorous, but they prevent small knocks from becoming expensive problems. Use dividers to stop lenses and accessories touching, and adjust them so the equipment does not shift when the bag is set down. A soft wrap can provide another layer around a lens or camera body when a compartment is not quite the right shape.
Before closing the bag, check that no buckle, cable or loose tool is pressing against a control dial or screen. Good protection comes from both padding and thoughtful placement.
Prepare for changing light and weather
Outdoor light can change quickly, particularly around tropical storms, heavy cloud and late afternoon. Weather can also affect how you carry and use the camera, even when rain never arrives. Prepare for the conditions you are likely to face, but keep each solution compact enough that it earns its place.
Pack a compact camera flash or LED light
A small flash or LED light can help when a subject moves into shade or an indoor location has uneven illumination. Check its batteries before the outing and keep the unit protected from pressure inside the bag. If you rarely use artificial light, practise with it at home first so it does not become a complicated emergency tool on location.
Pack only the light and accessories you understand well. A familiar, compact unit is generally more useful than a larger one that stays buried in the bag.
Bring reflectors and other light-shaping tools
A small reflector can soften harsh shadows or return light towards a nearby subject. Collapsible versions are easier to carry, though you still need room to open one safely without it catching on branches or other people. A simple piece of neutral, light-coloured material can sometimes be enough for a quick adjustment.
Consider the working space before you pack anything. Landscape photographers may need no reflector at all, while a portrait session in open shade can benefit from one more than from an additional lens.
Include rain covers and protective sleeves
A rain cover for the bag and a protective sleeve for the camera can give you time to move to shelter when conditions turn. Keep them near the top or in an outer pocket rather than beneath the camera body. In wet weather, avoid opening the bag more than necessary and wipe moisture from the outside before you put it away.
Pack for the weather you may meet, not only the weather you can see from the driveway.
That approach is especially useful in places where a clear morning can give way to a sharp shower. Weather protection should be easy to reach, or it will probably arrive too late.
Keep lens cloths and cleaning supplies handy
Dust, fingerprints and fine spray are normal parts of outdoor photography. Carry a clean microfibre cloth and a small blower or brush in a separate pouch, so grit is not dragged across a lens surface. Use the least aggressive cleaning method first and replace dirty cloths rather than returning them to the camera compartment.
Cleaning supplies should be accessible but sealed from loose sand. A small pouch also makes it easier to notice when you need to wash or replace an item.
Add practical accessories for smoother shoots
Small accessories can save a shoot, but they can also fill a bag without improving your photographs. Choose items that support a clear task: keeping the camera steady, maintaining power, moving files or making a quick adjustment. Store them where you can find them by touch.
Carry a reliable tripod or mini tripod
A tripod can help with long exposures, careful compositions and situations where you want the camera to remain in one position. It also adds bulk, so decide whether the location and technique justify carrying it. For lighter work, a mini tripod may support a compact setup without taking over the bag.
Check the tripod plate and leg locks before leaving. If you carry a full-sized tripod, attach it securely to the bag and make sure it does not catch on vegetation or knock against doorways.
Pack extra cables, chargers, and power banks
The right charging cable can be more valuable than a collection of miscellaneous leads. Pack the cables that match your camera, phone and other equipment, then secure them in a small pouch to prevent tangles. A power bank can be useful when you will be away from a wall socket, provided it is charged and compatible with your devices.
Do not assume every power bank or charger is suitable for every camera. Check the equipment instructions and test the setup before relying on it in the field.
Use a card reader and portable storage
A card reader can help you transfer images when you need to review or back up files away from your main computer. Portable storage may be useful on a longer trip, especially when you do not want to fill every card in the kit. Keep these items protected from dust and label them so you can identify the correct connection quickly.
If you copy files during an outing, take a moment to confirm that the transfer completed before formatting or reusing a card. A backup is only useful when the files can actually be opened.
Bring tools for quick adjustments and repairs
A small multitool, spare screw, cable tie or strip of removable tape can handle minor problems with straps, tripod plates and loose fittings. Keep tools compact and separate from delicate equipment. You do not need a full workshop; you need a few items suited to the gear you actually carry.
Make a quick repair kit after noticing a recurring problem. That keeps the pouch practical instead of allowing it to become a collection of objects you have never used.
Pack personal essentials for long shooting days
Photography outings often last longer than expected, especially when the light improves just as you planned to leave. Personal items are therefore part of a sensible camera bag, not an afterthought. They help you stay comfortable, alert and able to carry your equipment home safely.
Carry water, snacks, and basic first-aid supplies
Pack water in a leak-resistant bottle and keep it upright where possible. A small snack can be useful when you are away from shops or walking between viewpoints, while a few basic first-aid items can help with minor scrapes. Keep food and liquids in a separate section from cameras, cards and batteries.
Choose packaging that will not crumble into the bag. A dedicated personal pouch also means you can remove these items easily when you are carrying the camera indoors.
Choose comfortable clothing and weather layers
Wear footwear suited to the ground rather than to the photograph you hope to make. Lightweight layers let you adjust to wind, heat or a cooler evening without placing clothing over the camera body. A brimmed hat and breathable fabric can also make long periods outside more manageable.
Keep a thin waterproof layer available when showers are possible. It can protect you and reduce the temptation to use the camera bag as shelter for wet clothing.
Add sunscreen, insect repellent, or hand warmers
Your location and season will determine which comfort items deserve space. Sunscreen and insect repellent can be useful for warm outdoor sessions, while hand warmers may suit cold-weather work. Put them in a sealed pocket so creams and sprays cannot leak onto equipment.
Avoid packing a full collection of products. Take the item that matches the conditions and check the container before placing it beside anything delicate.
Keep identification, payment cards, and permits secure
You may need identification, payment cards or a permit for a particular location. Store these in a zipped pocket that is separate from camera accessories and easy for you to reach without exposing the rest of the kit. Keep only what the outing requires, and avoid leaving important items in an unattended bag.
A small waterproof wallet can protect paper permits and reduce the chance of a card slipping into a camera compartment. Make a final check before you drive home, too.
Organize your camera bag for fast access
An organised bag saves time and reduces handling, which matters when the light is changing or a subject is moving. Give each item a consistent home and return it there after use. Your arrangement should make sense when you are tired, working in low light or wearing gloves.
Store frequently used items in outer pockets
Place lens cloths, spare cards, a small torch and weather protection in pockets you can reach without opening the main compartment. Keep the camera and lenses in the padded centre, where they are less exposed to loose objects. Frequently used items should not be buried under equipment you only carry occasionally.
After a few outings, notice what you reach for first. Move those items to more convenient pockets and remove anything that repeatedly comes home untouched.
Separate delicate gear from everyday essentials
Cameras, lenses and memory cards need protection from keys, food wrappers, coins and other hard objects. Use separate compartments or pouches for personal items and keep liquids away from all electronic equipment. The separation also makes it easier to unpack the camera kit without spreading everyday belongings across the ground.
A simple colour or texture difference between pouches can help you identify them quickly. Keep the delicate side of the bag consistent from one outing to the next.
Label batteries, cards, and chargers
Labels do not need to be elaborate. A small mark on a battery case, card wallet or cable pouch can show what is charged, unused or compatible with a particular device. This is particularly useful when several accessories look alike.
Use labels that will not leave adhesive on the equipment itself. A short check before packing can then prevent the familiar problem of carrying a full pouch with no charged battery.
Adjust your kit for portraits, travel, or outdoor photography
Your camera bag should change with the assignment. A portrait session may need a light, reflector and spare power, while travel photography may favour a compact lens range and discreet access. Outdoor landscape work can call for weather protection, a tripod and cleaning supplies, but not every lens you own.
Before each outing, remove three things that do not suit the plan, then add only what the location demands. That small reset keeps your camera bag essentials useful rather than turning the bag into a portable cupboard.
Conclusion
The best camera bag is the one that lets you concentrate on making photographs rather than carrying equipment. Start with a manageable core kit, protect it from weather and knocks, add practical personal items, and organise everything around how you work. A short check before each outing will keep the bag lighter, more comfortable and ready for the conditions in front of you.
Frequently Asked Questions
How many lenses should you carry in a camera bag?
Carry the lenses that suit the subject and location, usually starting with one primary lens and adding a second only when it offers a useful change of perspective. Extra lenses are worthwhile when they solve a likely shooting need rather than simply filling space.
Should a camera bag be waterproof?
Weather-resistant materials and a rain cover can help protect your equipment from showers, but no soft camera bag should be assumed to be completely waterproof. Keep the cover accessible and avoid opening the bag unnecessarily in heavy rain.
What should you keep in an everyday camera bag?
A practical everyday kit may include a camera body, primary lens, spare battery, memory cards, lens cloth, basic protection and a small amount of personal gear. Adjust the list to your subject, route and expected conditions.
How do you stop camera equipment from moving inside a bag?
Use adjustable padded dividers, fitted pouches and lens caps, then check that no compartment has excessive empty space. The equipment should sit securely without being forced into a tight position.
Is a tripod essential for every photo outing?
No. A tripod is useful for long exposures, careful compositions and a stationary setup, but it adds weight and bulk. Leave it behind when your planned photographs do not require that support.
How should you pack spare memory cards?
Keep spare cards in a protective case, separate from loose objects and away from moisture. Use a consistent system that distinguishes unused cards from those already filled during the outing.
How often should you repack your camera bag?
Review the bag before every outing and do a deeper reset when your subject, season or travel plans change. Remove unused equipment, recharge batteries, replace dirty cleaning cloths and confirm that weather protection is ready.